Publishing Your Jupyter Notebooks, Get Your Insights Standout
Table of Contents ▼
Introduction:
Fortunately, I get an admission of master of Biostatistics from ASU. To gain hands-on experience on data analyses, I’ve spent some time working on resume or side projects; thus, this article comes out.
Although I only got an interview for data analyst position, this experience motivated me to write this article; also, the article is a pro tips to myself, which help me to write a better resume.
some bullet points helps resume better
I merely modified my resumes from my previous job, Java backend engineer; additionally, experience dose not change overall. That’s why interviewer can not identify reasons why I can be standout.
After the interview, I summarized some bullet points to strengthen my resume.
- python skills
- present your data analysis outcomes
In next section, I will introduce how to use jupyter notebook to present your work on portofolio.
Why Use Jupyter Notebook:
Choosing Jupyter Notebook for a data analysis project presentation has several advantages:
- Jupyter Notebook can be published on the web, making it understandable to HR or PMs without a technical background.
- Besides supporting markdown documents, Jupyter Notebook also supports Python and R code blocks, showcasing coding skills more intuitively.
- GitHub repositories only contain code, making it difficult for interviewers to quickly assess a candidate’s proficiency.
How to Start a Jupyter Notebook Project:
Pre-requisites:
- Install Anaconda or Miniconda (a lightweight version of Anaconda). Use the
condacommand in the command line.
Open the command line and enter the following commands to install Jupyter Notebook and related packages in your environment:
-
Update Conda packages
conda update conda -
Create a virtual environment:
conda create -n yourenvname python=${your python ver.} -
Activate the virtual environment:
conda activate yourenvname -
Install the necessary packages in the virtual environment:
conda install -c conda-forge jupyter-book jupyter
Creating a Jupyter Notebook Project:
What is Jupyter Notebook?
- An interactive web interface where you can write and execute Python code directly within the notebook.
- It combines IPython (interactive Python execution) and Notebook.
Here’s how to create such a project:
- Add files to an existing Jupyter Notebook project
Files to add:
- Basic Jupyter Notebook configuration information (
_config.yml) - Table of Content settings for Jupyter Notebook (
_toc.yml)
- Use Jupyter Book commands to create a new project
After setting up the environment, use the
jupyter-bookcommand to create a template:jupyter-book create your_folder/
After creating the Jupyter Notebook project, the folder structure is as follows:
P.S. You can use the tree command to view the structure.
$ tree your_folder
your_folder/
├── _config.yml
├── _toc.yml
├── intro.md
├── logo.png
├── markdown-notebooks.md
├── markdown.md
├── notebooks.ipynb
├── references.bib
└── requirements.txt
Make sure to include requirements.txt for installing dependencies during deployment.
Simple _config.yml settings:
# In _config.yml
title: My sample book
author: The Jupyter Book Community
logo: logo.png
execute:
  execute_notebooks: force

# Add a bibtex file for citations
bibtex_bibfiles:
  - references.bib
Three main settings:
- title: Your Jupyter Notebook title (customizable)
- author: Author name (customizable)
- logo: Your logo image name For more details, refer to here
Simple _toc.yml settings:
# In _toc.yml
format: jb-book
root: intro
chapters:
- file: markdown
- file: notebooks
- file: markdown-notebooks
Main settings:
- format: Jupyter Book display style (
jb-articleorjb-book) - root: The homepage of your Jupyter Notebook
- chapters: Add multiple filenames as chapters in the yml file, each representing a chapter.
Publishing Your Jupyter Notebook on the Web:
Currently, the jupyter notebook’s development team recommends using Netlify as the main solution for deployment. This section outlines the general process for completing the deployment.
Steps:
- Register an account (it’s recommended to use GitHub)
- Link the project you want to deploy from GitHub. After linking, an authorization window will appear, simply click “Yes.”
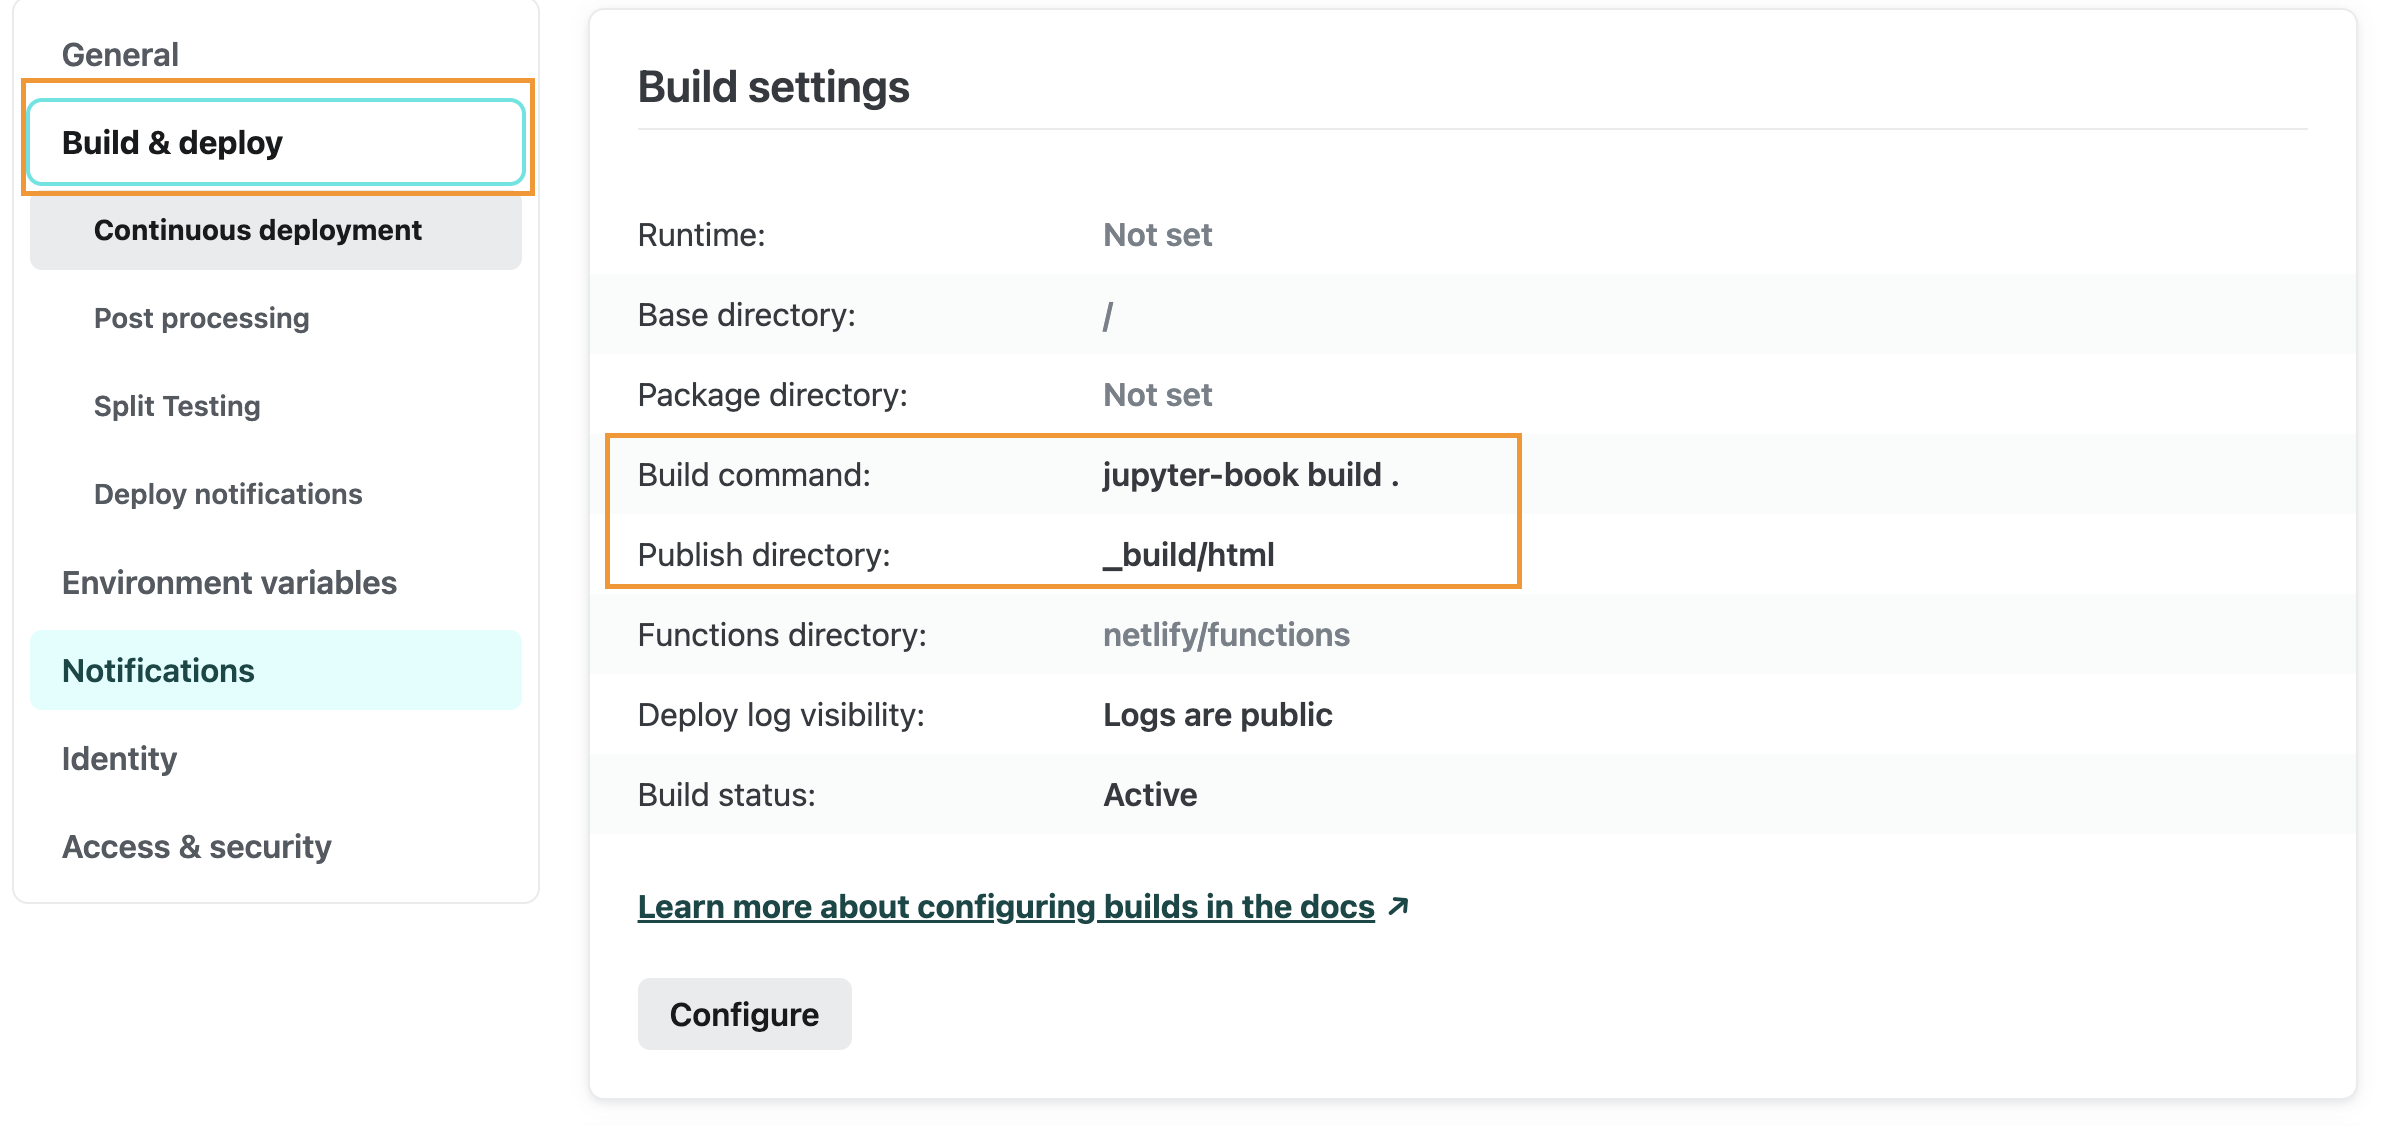
- Set the
build commandandPublish directoryoptions in the deployment settings to ensure successful deployment. For more detailed settings, check here